This kind of project has captured my interest long before I even started working on it. For a long time I wanted to do a project that’s heavily inspired by the New York City subway system. I love the urban look, and I thought that New York – known for its huge skyscrapers and overall urban jungle – together with the subway would make a great representation of that.
I worked on this project for around 2 weeks and I would’ve definitely kept working on it if I wouldn’t have put a 2 weeks deadline for myself.
I starting working on this project with something else in mind. All the assets that have been made for this project, were initially planned and done for creating a game environment scene inside Unity & Unreal. While creating the assets, I decided that I have a good foundation for creating some traditional renders as well.
All assets were modeled and UVed inside Blender, and then textured inside Substance Painter. All the assets have been done in a modular manner, so everything is easily connected and you can create various compositions and environments using the modules.
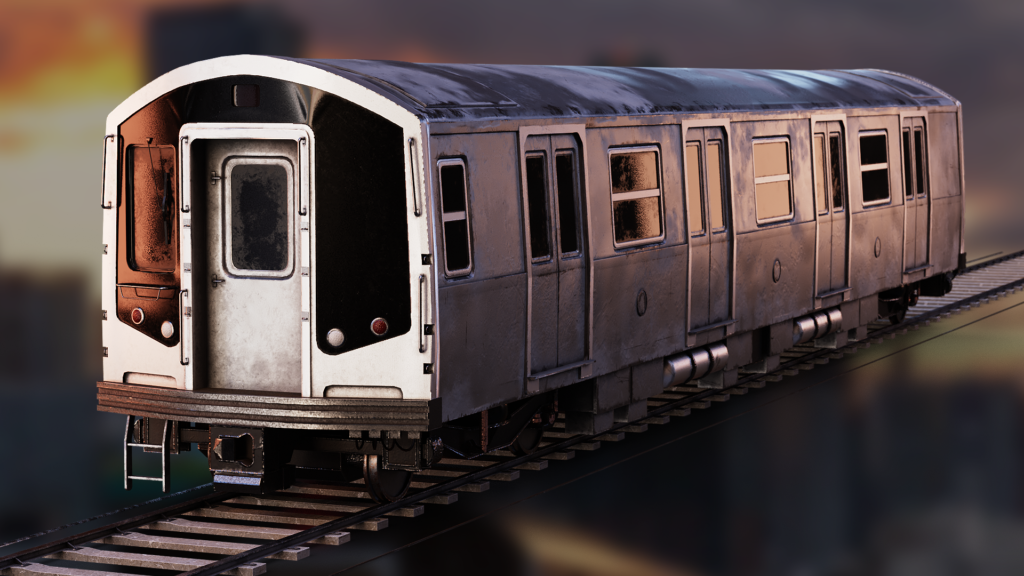
The main piece – the train – took the longest to be modeled and textured. The asset uses 3 materials for various parts separated based on their dimensions and the quality level that was needed for that part of the train. One single material could’ve been used and, initially, it was, but the resolution had suffered when using a single material, so we decided on using 3.
This is an early render of the train after being textured in Substance Painter:
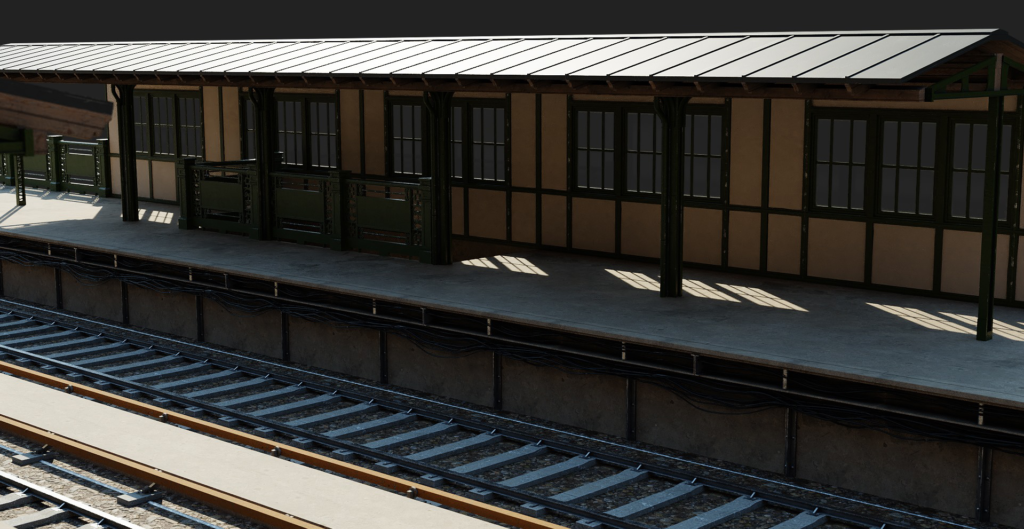
After I had all the assets I initially planned, ready, I started building up the scene with the final assets. A block-out has been used at first when deciding the skeleton of my environment and I established how I’m going to construct the modular assets.
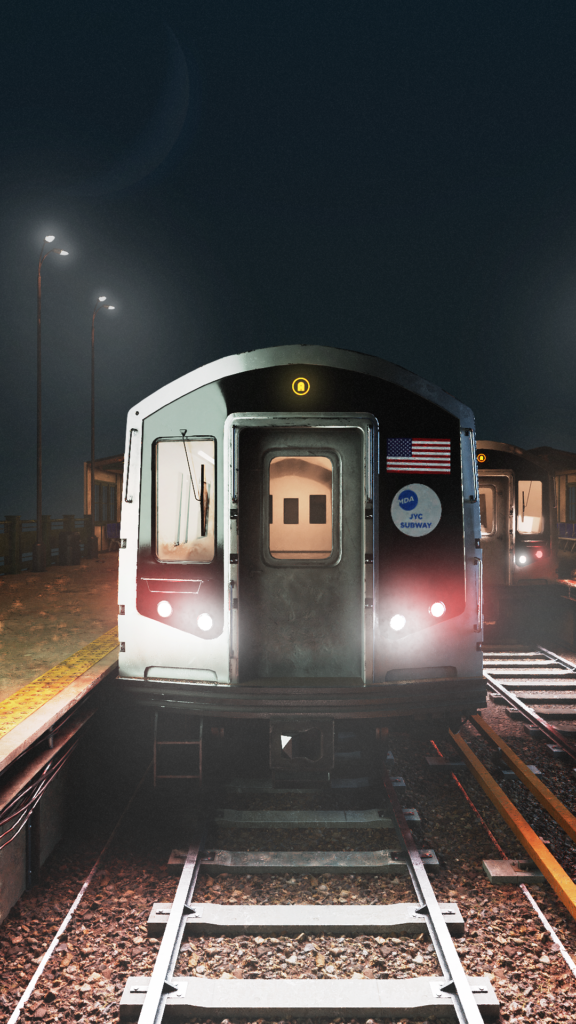
An early render from when I was building up the environment and tested with different lightings:
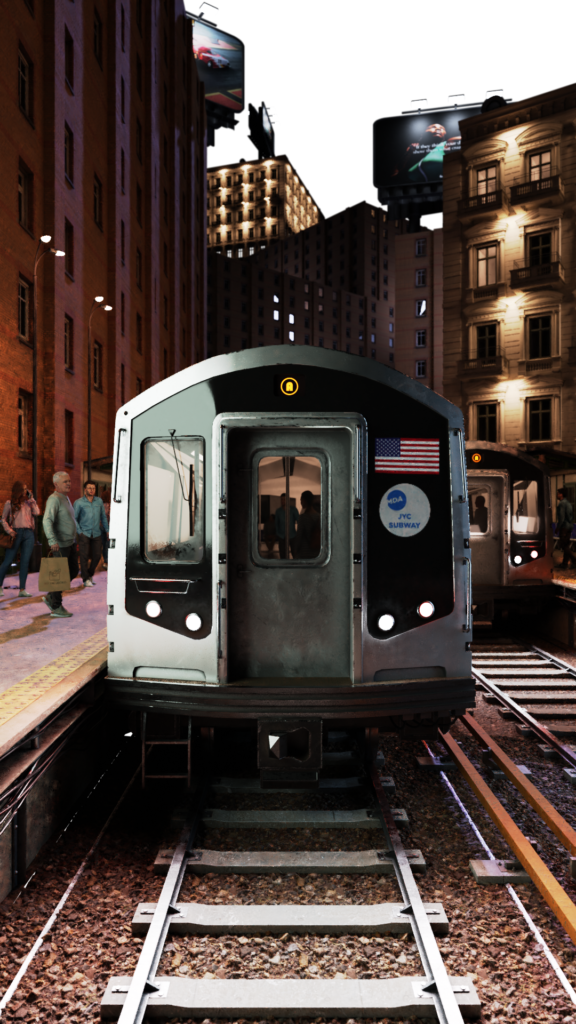
After finishing building the scene with all the modules and finding a camera placement I liked for my main render, it was time to work on the composition and see where I’ll be taking this render. At first I was looking to create some kind of day scene, and this is one of my earliest renders:
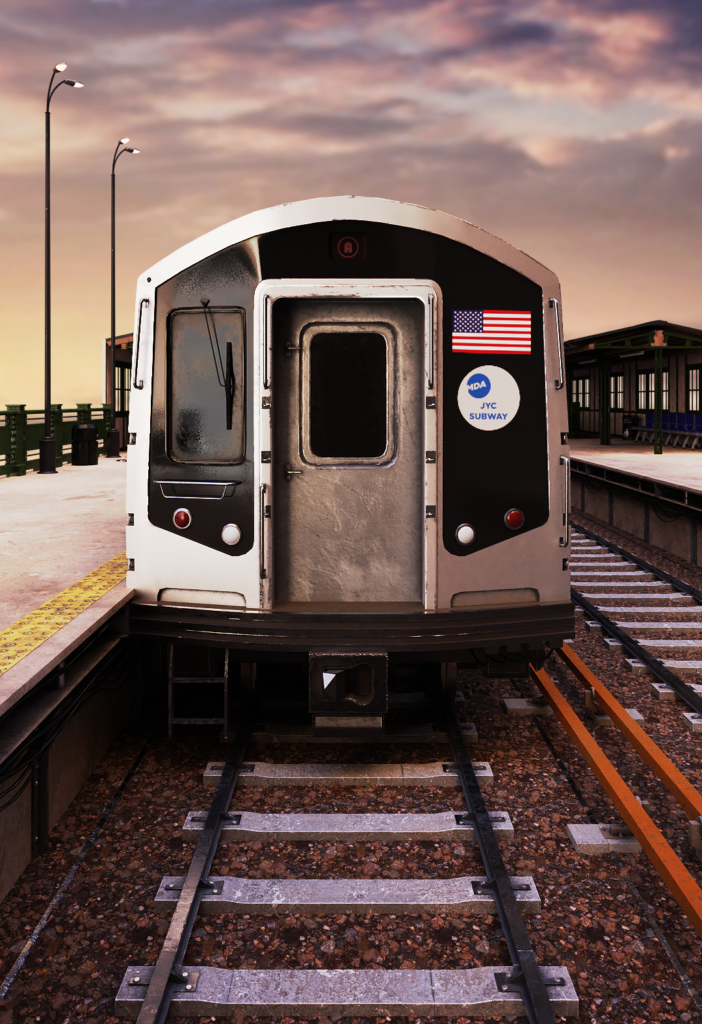
After rendering this image I started thinking of drastically changing my plans for what I wanted to do with this scene. It’s obvious that this first render was really far off from what I had in my mind, even if it was heavily work in progress.
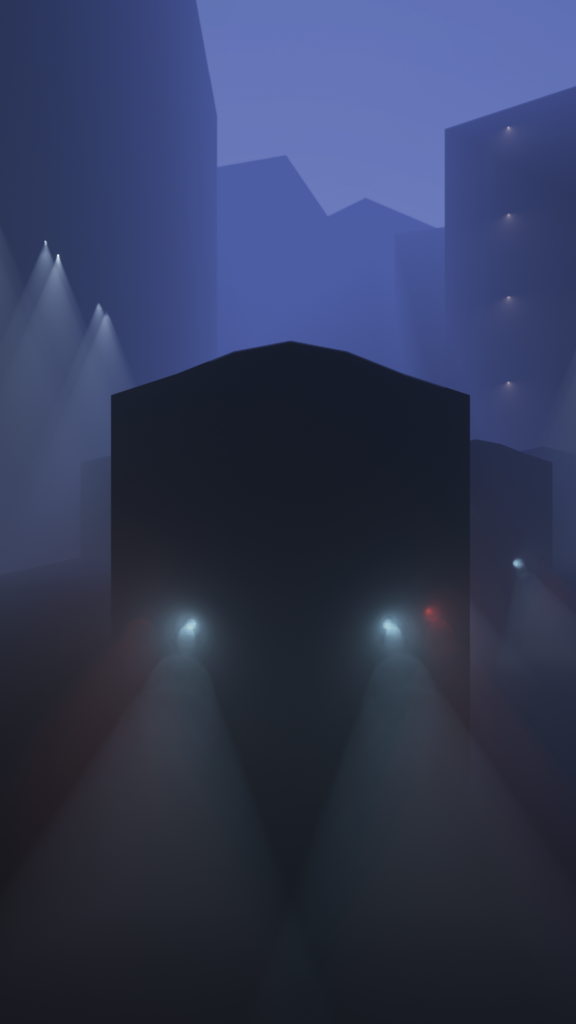
This is when I decided that I’m going to go into a night scene direction. I knew that a night time scene will give me a lot more room when lighting and playing with the look of this scene, and I also wanted to implement volumetrics in the scene, and that always works best with multiple, different light sources.
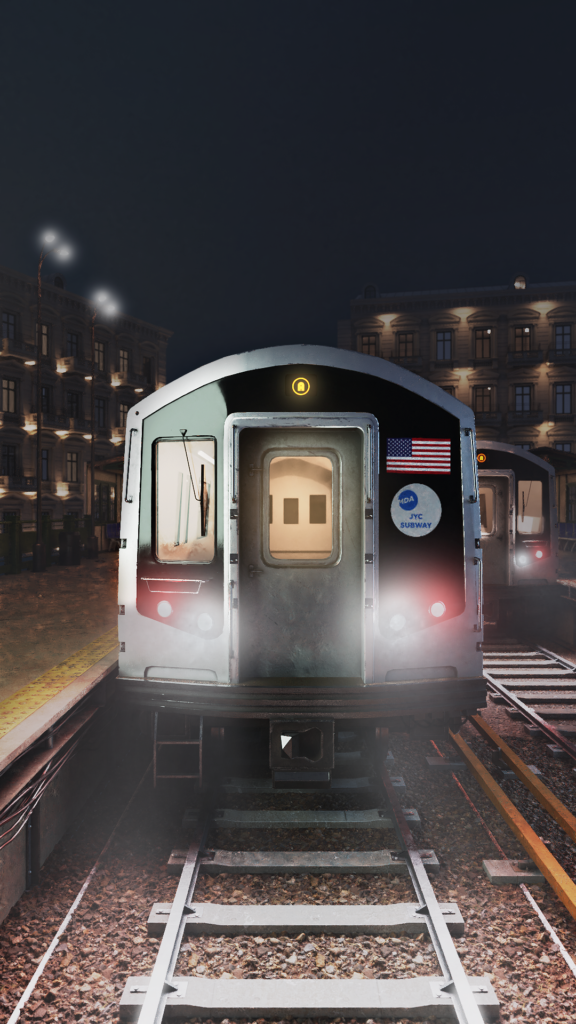
And so, after doing some adjustments and bringing the scene to a night time, this is how my progress was looking like:
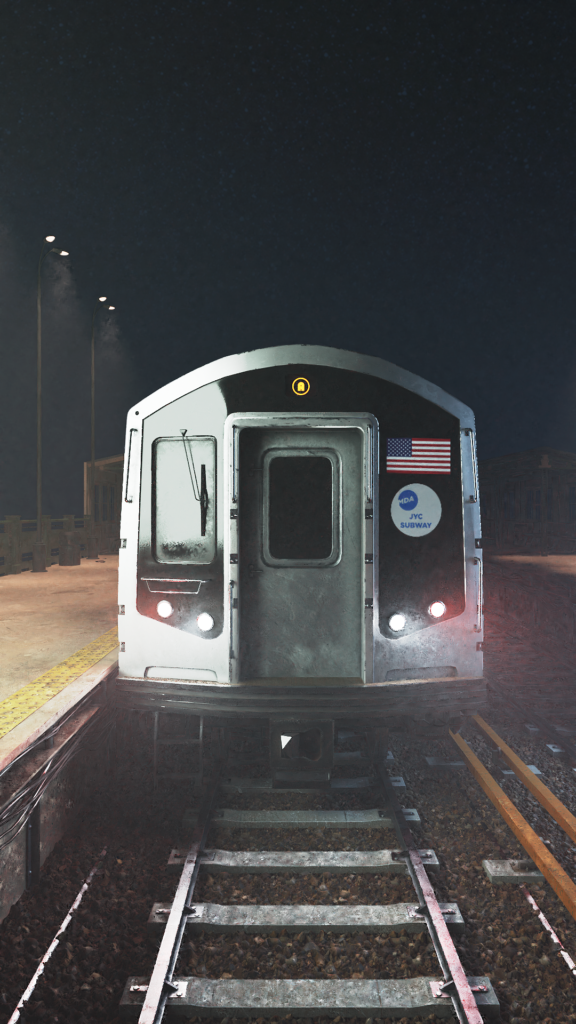
The scene was definitely starting to improve and, at this point, the scene was starting to take some shape which made it easy for me to just let my mind run full with ideas on how I want to further improve this render.
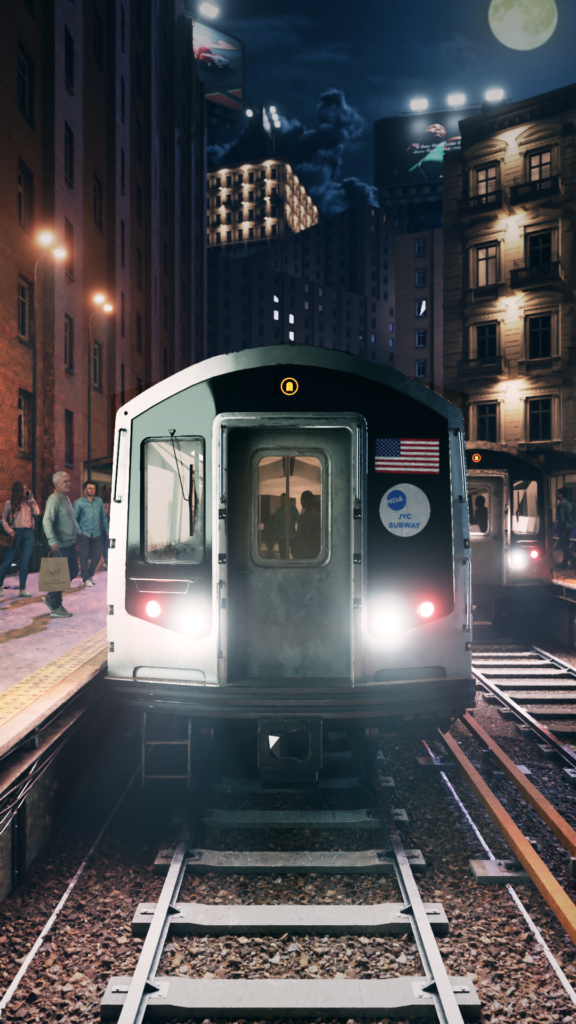
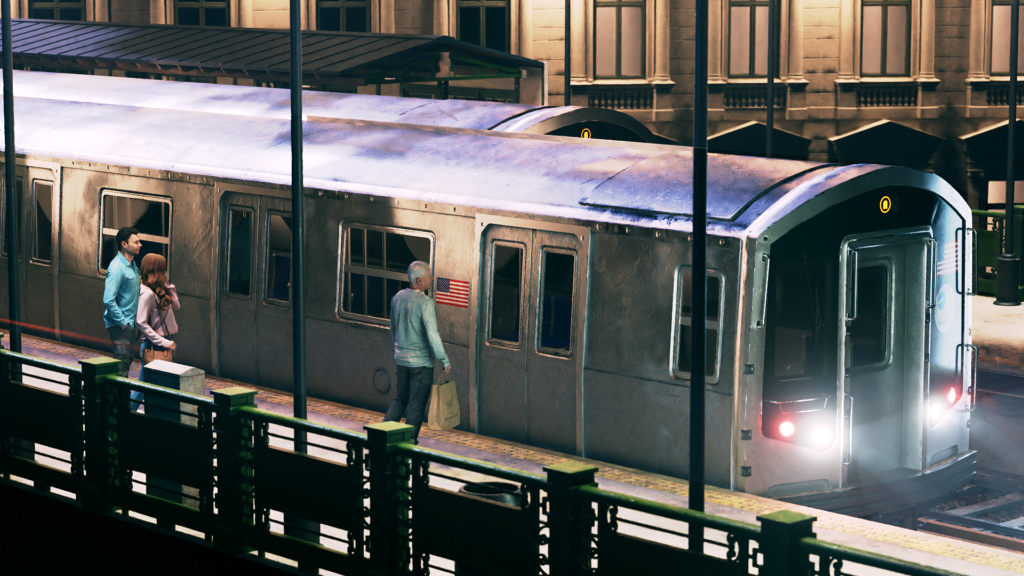
These are a few renders that show my progress over the time:

After I got my final composition and my scene was close to finished, I was thinking about the best way to implement the volumetric fog into my scene. The scene is rendered in Cycles, and rendering volumetric fog, and especially so much of it, with Cycles presents a couple of big issues:
– The fog gets blown and suffers A LOT from Cycles denoiser, so you need to pump the samples number a lot higher;
– Increasing the number of samples will increase the time it takes your computer to finish rendering the scene…. and after all that time waiting to render, your fog still looks like crap.
So it was obvious that simply adding volumetrics into my scene, just like that, was out of discussion.
So what I ended up doing is combining a few render passes, both from Cycles and Eevee, to end up with my final render. I rendered my main scene with no volumetrics at all. This is the raw render:
After I’m done with rendering this raw image, I then created a simple block-out of my scene as it was. Meaning that I took some cubes and rapidly recreated the big shapes of the assets I have in the shot. I applied a dark material with roughness 1 on everything that was part of the second block-out, and simply added volumetrics there. This way I got a volumetrics pass that didn’t need so many samples and follows the shapes of my scene.
I ended up doing this exact same thing in both Cycles and Eevee, because one gives you a more dispersed and ambiental fog, while the other one gives you a more direct fog that creates some really great fog interacting with your lights, here’s the two:
I also wanted my highlights and sources of light to have a bloom effect. Rendering with Cycles won’t give you this unless you do some compositing inside Blender with some blur nodes, but I personally don’t like the effect it’s creating. Instead, I opted to do something similar to what I’ve done for the fog. Rendering with Eevee gives you some nice bloom effect, and I wanted that in my final render. So what I’ve done was to isolate all my assets that were emitting light and knew that would need to have a bloom effect. I then switched to Eevee and rendered those light-emitting parts over a black background, getting a render like this one:

I then brought my raw render into Photoshop and placed all the other passes on top, with a Screen blending mode so that the blacks would become transparent, and I’d only preserve what I needed from those pass renders. I used masks, opacity and so on to really polish the way the render looked.
I did this for all the other renders as well and, finally, this is what I came up with:

Radu Mitroi
Mitrech, CEO